We made a video on how to remove vinyl graphics from a vehicle. If you prefer the video over the article, click here!
So, you’re looking to remove some vinyl graphics from a vehicle! Awesome! We’re here to help you go about doing so in the best way for you. The main idea is that you want to warm the glue and the vinyl to the point that it can be easily removed and leave a minimal amount of glue on the vehicle. You do not want to damage the used vehicle, but depending on the age and wear of the paint, you may find that vinyl can pull off old corroded paint.
First of all, let’s talk safety and tools. You always want to have a pair of eye glasses and rubber gloves to protect yourself from the chemicals used to remove the glue and the steam coming from the steamer (if you are using one). Next, you’re going to look for a solvent that will help you remove glue. We use a can of Transtar to help pull up any remaining glue from the vehicle, however any of these types of chemicals would work. Next, you’re going to want something to help you get an edge you can pull the vinyl graphics up with. We use a plastic chisel, but anything that allows you to get under the vinyl graphic without damaging the paint would work. Lastly, you’re going to need a heat source. In our video we show you how to use our favorite method, steaming the vinyl, and why that’s the best. It allows for you to warm the graphic and the glue underneath without damaging or burning the vehicle clear coat. However, a torch or a heat gun would work the same, just be careful not to burn yourself or the surface that you are removing the vinyl graphics from! If you have nothing else, something like a hair dryer would be better than nothing! When using heating alternatives to the steamer, you must be very careful to always keep the heat moving so that you do not burn the vehicle.
First, we will teach you how to remove vinyl graphics using a steamer. You’re going to steam the vinyl, being sure to adequately warm it and the surface that it is on. It should be warm to the touch but should not burn you. Then you’re going to use the plastic chisel to lift a corner. Once you have a corner to the vinyl graphics lifted, you can slowly pull the graphics from the vehicle and steam as you go. You want to be careful to not go too fast, as you can pull faster than you can heat the vinyl. This makes it much harder to pull up as well as it makes it much more likely to pull off paint. You also want to be careful that you’re keeping your hands away from the heat. Depending on the material you are working with, the age of the vinyl and the technique you are using, this vinyl graphic may come off in one pull or it may break a couple of times as you are removing it. Higher quality vinyl comes off easier, even years and years later, than cheaper vinyl. If you are heating this material properly, minimal amounts of glue will be left behind.
Second, the blow torch. These are usually available for purchase at your local home improvement store and generally cheaper than a steamer. Most of what was previously stated is true about using a blow torch, but there are a couple of things you’re going to want to change. First off, take your time! Do not rush a torch as there is a very fine line between quick work and burning the surface you’re working on. Also, you can over heat the graphic and it can burn you when you touch it. None of these are good things so just go slow and heat the graphics much slower. Second, while a steamer can still burn you, an open flame can be much more dangerous. Be aware of your clothing, your skin or any chemical residues that may be on the surface so that you do not burn yourself or the area you’re working on when operating a blow torch. Also be aware of any lifted edges on the vinyl graphic that you are removing, as they can catch on fire very easily. When using a torch, always keep the flame moving. Never let one spot of vinyl overheat. The process is the same, heat, lift a corner and pull!
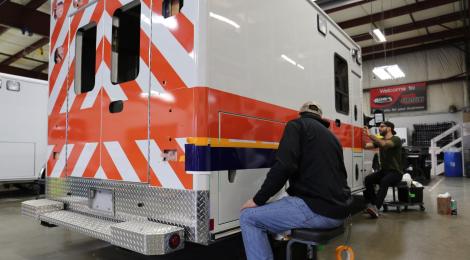
The last step of this process is going to be how to remove the left-over glue from the area that you are working on. In our case, we were working on a used ambulance. Always make sure that the chemical you are using is safe for the surface that you are working on. As stated above, we are using a Transtar chemical that helps us remove the left-over glue. The steps for removing glue may be different depending on what kind of chemical you are using. You want to first, saturate the remaining glue with the chemical. It is slowly being broken down when it is saturated by the chemical. You want to be aware of where the chemical may be dripping, as you don’t want to saturate good graphics and cause damages to parts of the vehicle that you wouldn’t want damaged. After it has sat on the glue for long enough that there is a visible change of color, you want to saturate it one more time with your chemical of choice and then you can start to remove it. To remove it, you’re going to want to use your plastic chisel and slowly (without scratching the paint) lift the glue off of the vehicle. If the chemical has done its job, your left-over adhesive will lift easily off of the paint and allow you to wipe it dry with a towel.
Congrats! That’s all there is too it. You have successfully removed vinyl graphics from a vehicle or whatever work surface you’re working off of. If you have any questions, feel free to email us. If you’d like us to remove your graphics, we’d be more than happy to give you a quote for the job. Our email is help@usedambulances.com

Providing the country with the most transparent and high quality used ambulance purchasing experience.

